Blog Stone Maintenance Tips & Information
Project Profile Onyx Table Repair

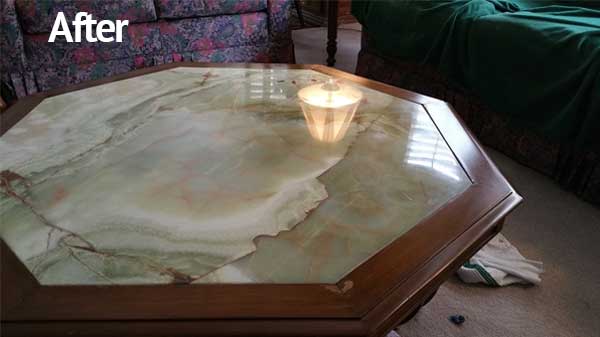
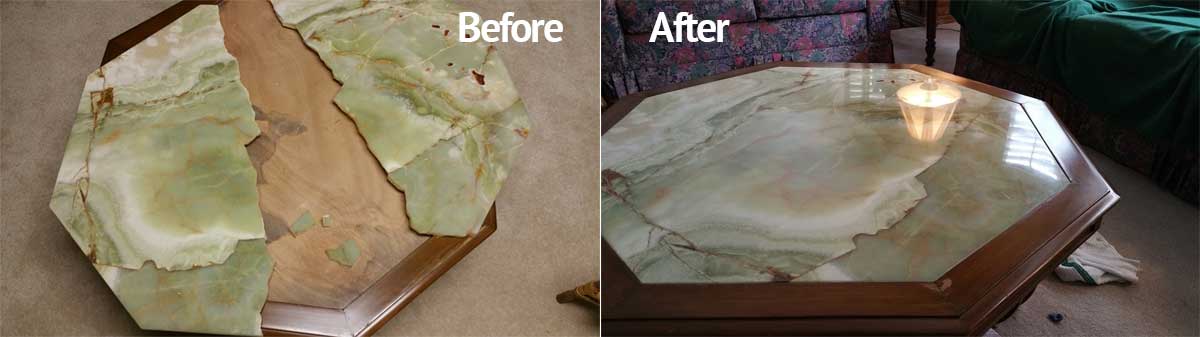
The photos attached were for an interesting project. The owner of the table pictured purchased it more than 40 years ago in another county. The table was broken by her moving company and since it was such a unique piece, we were called to repair it.
It is difficult to tell from the picture but each side of the octagon is not the same length so when the repair was completed placing it back in the inset was a challenge.
 The first step was to remove the broken pieces from the table inset. We then set up a work station in her garage. We separated all the large pieces then dry fit them in place. Once we had them dry fit we pulled them back apart. We then had to glue the pieces back together. For this project we used two adhesives both from Bonstone Materials Corp. The first was their Fast Set Extreme Epoxy. We applied a bead of the adhesive along thecenter of the break along each side. We then slid thelarge pieces togetherthen applied adhesive to the smaller pieces and set them in place. Once the pieces were loosely fit together we used large C-Clamp to squeeze the broken pieces together tightly. Once this was done we usedDymond, a two part structural patching adhesive, to fill the surface pits and voids along the break.
The adhesive takes about an hour to fully cure and once it had we sanded the entire crack to remove the excess adhesive. From this point we diamond refinished the entire piece removing all etches, scratches and other blemishes then repolished and sealed the entire piece. Start to finish the project took about 5 hours and the customer was left with a completely restored table top.
By Josh Huseby 8-5-2016